
For those who received a Money Forward integration link
Overview
This page is for those who received a link. An accounting firm or company that uses EntrySnap has sent you a link to allow integration with Money Forward Cloud Accounting (マネーフォワード クラウド会計). In Money Forward Cloud Accounting, only the full administrator (全権管理者) can allow integration with external apps, so we ask you, as the full administrator, to complete this step. You do not need to register or log in to EntrySnap.
Money Forward screens are shown in Japanese only. In the steps below, button and screen names are shown in Japanese with their English meaning in parentheses.
Allow integration
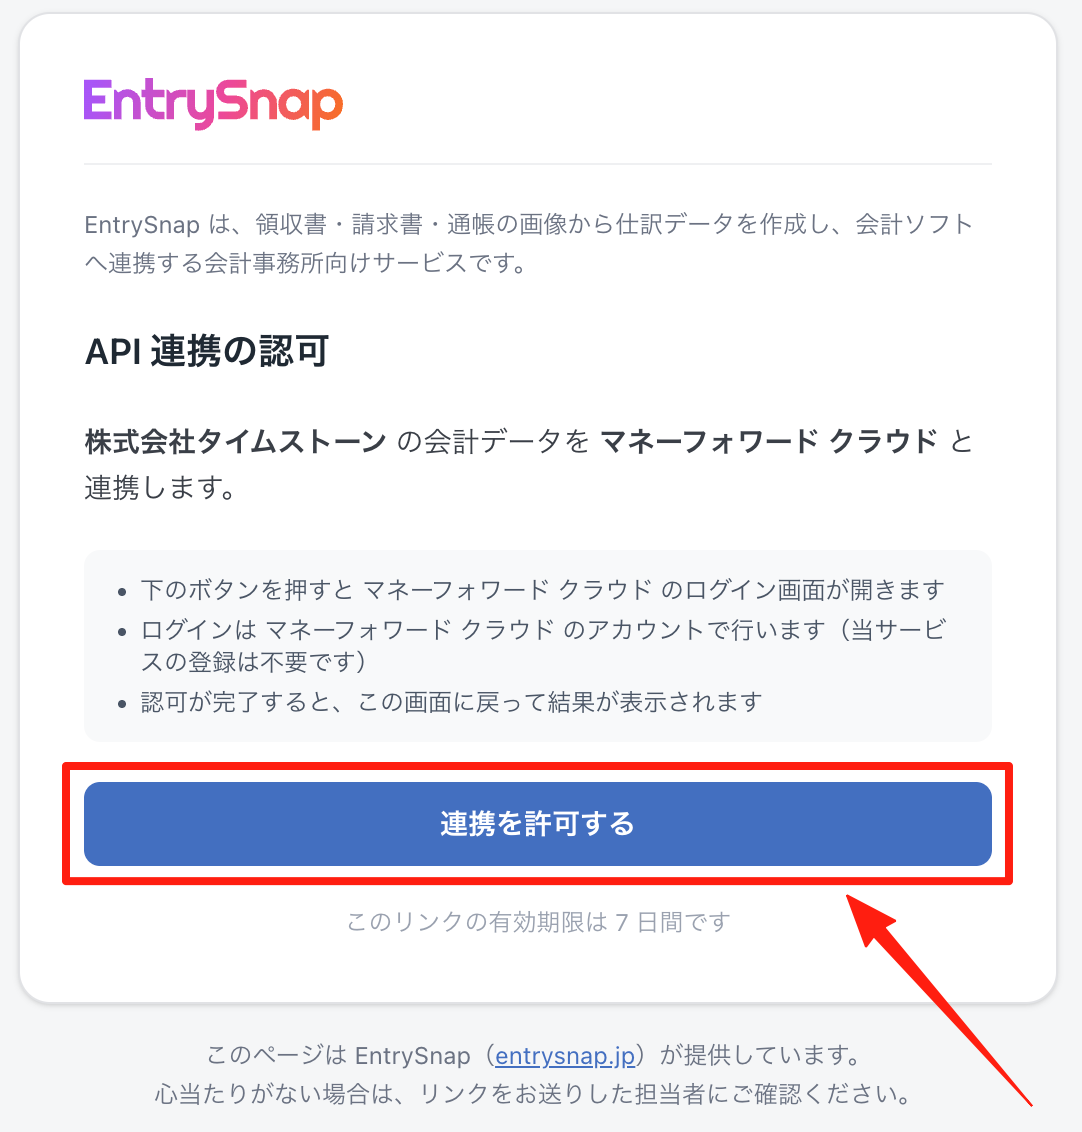
1. Open the link you received to display the authorization page. Check the company name and service name to be connected, then click 「連携を許可する」 (Allow integration).
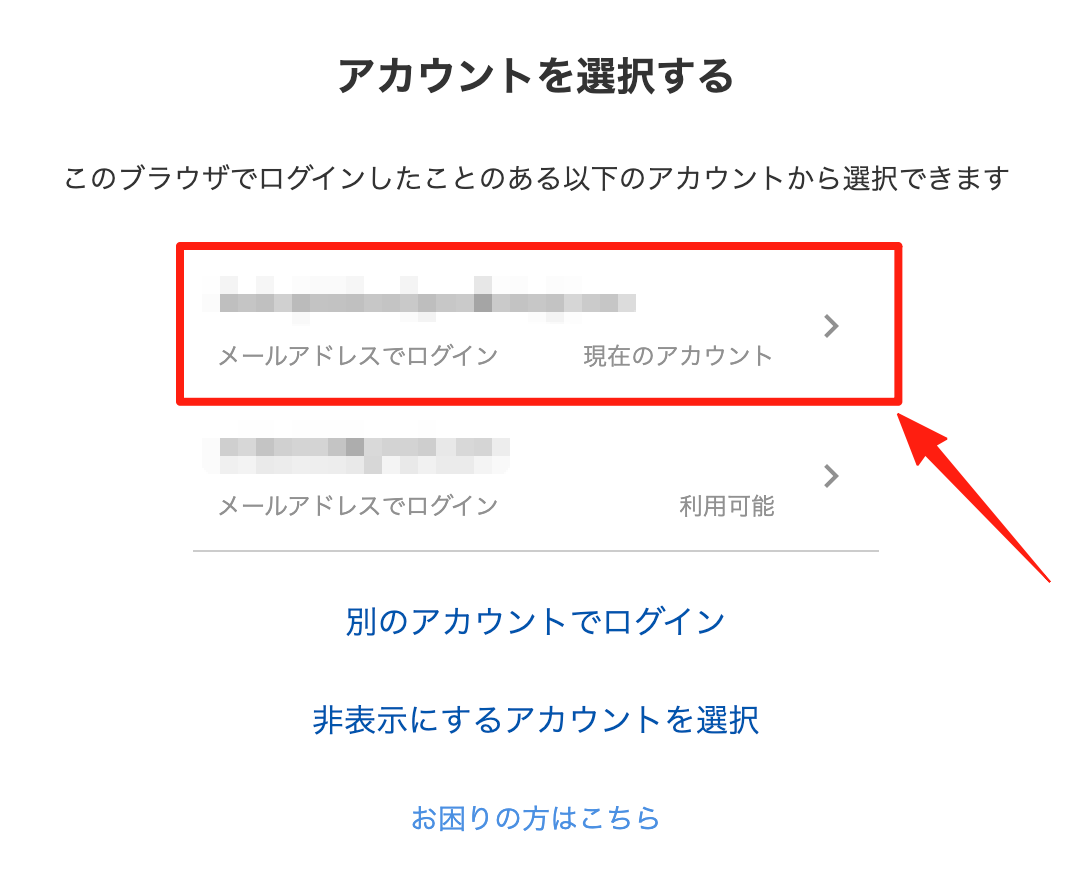
2. Money Forward’s 「アカウントを選択する」 (Select an account) page opens. Click the full administrator’s account to log in.
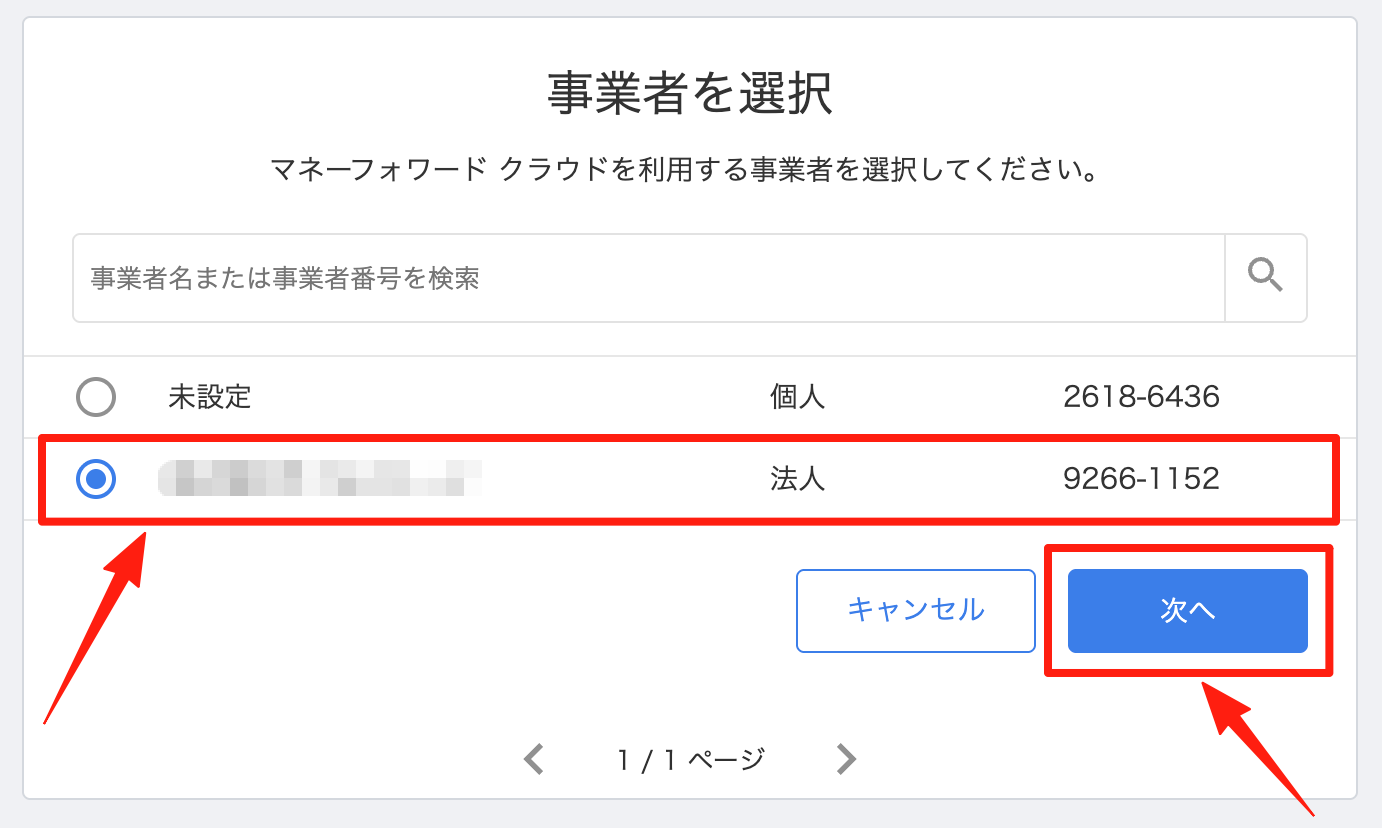
3. On the 「事業者を選択」 (Select a business) page, select the business to connect and click 「次へ」 (Next).
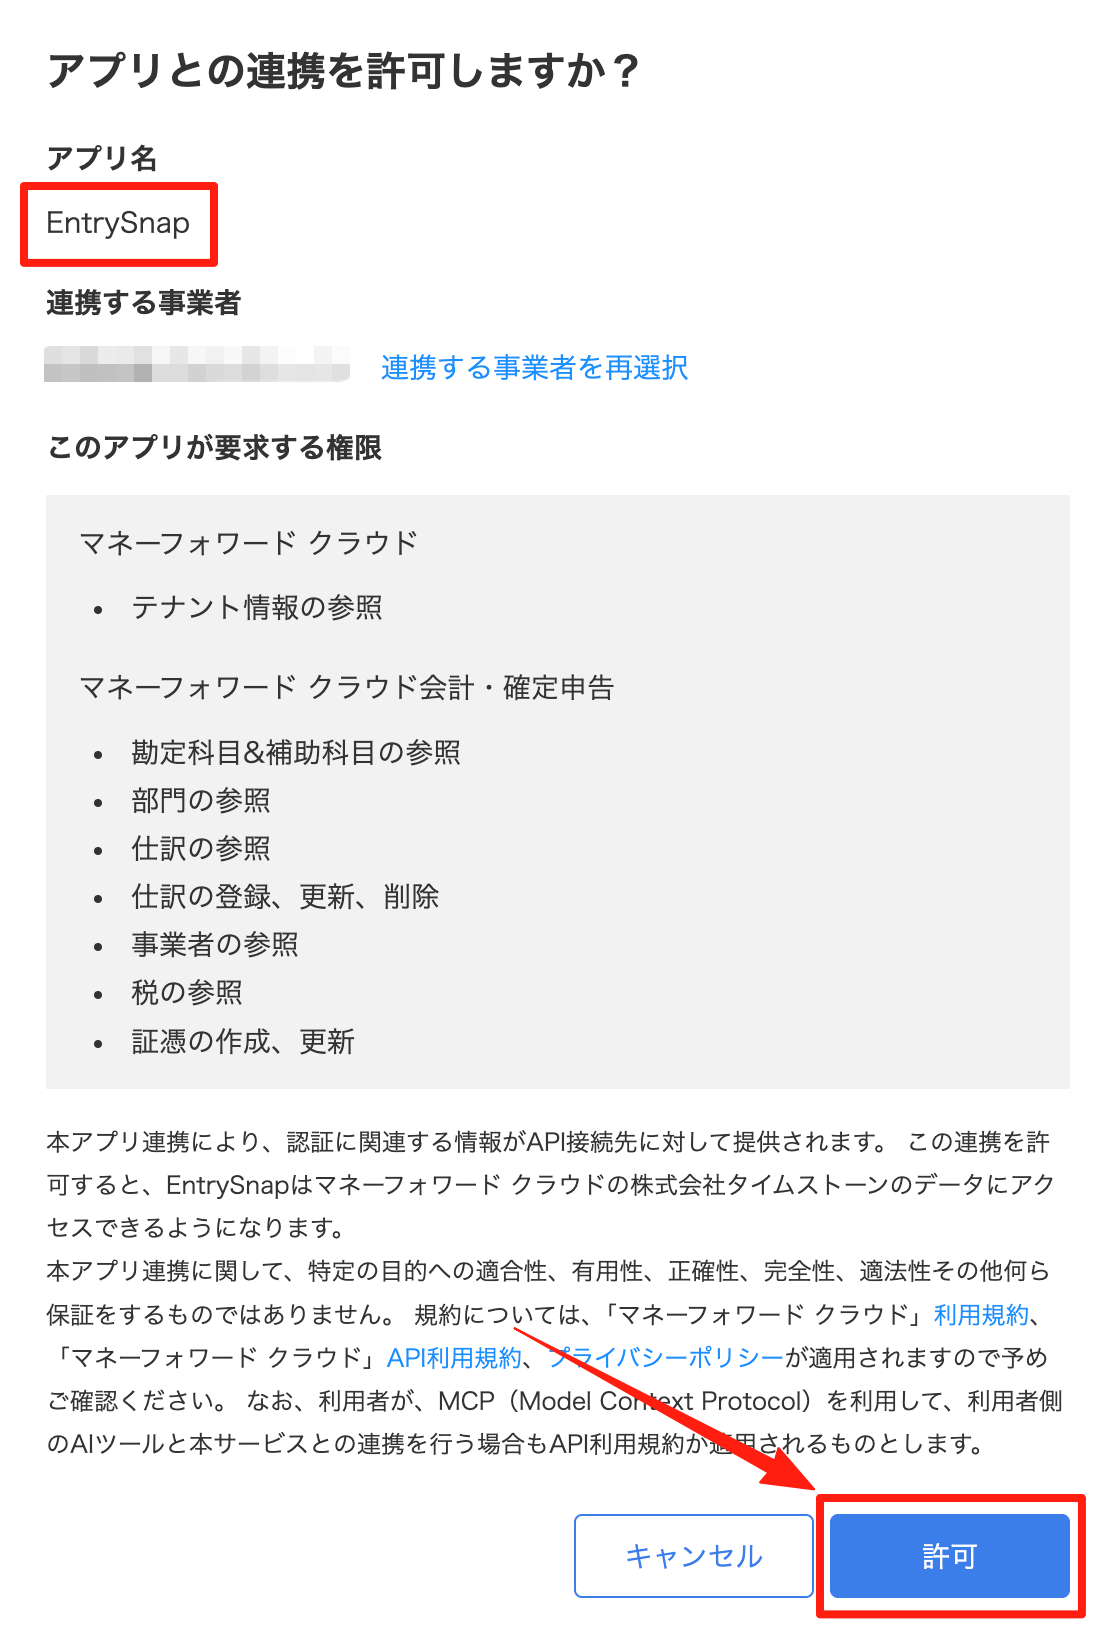
4. On the 「アプリとの連携を許可しますか?」 (Allow integration with the app?) page, confirm that the app name is “EntrySnap”, then click 「許可」 (Allow).
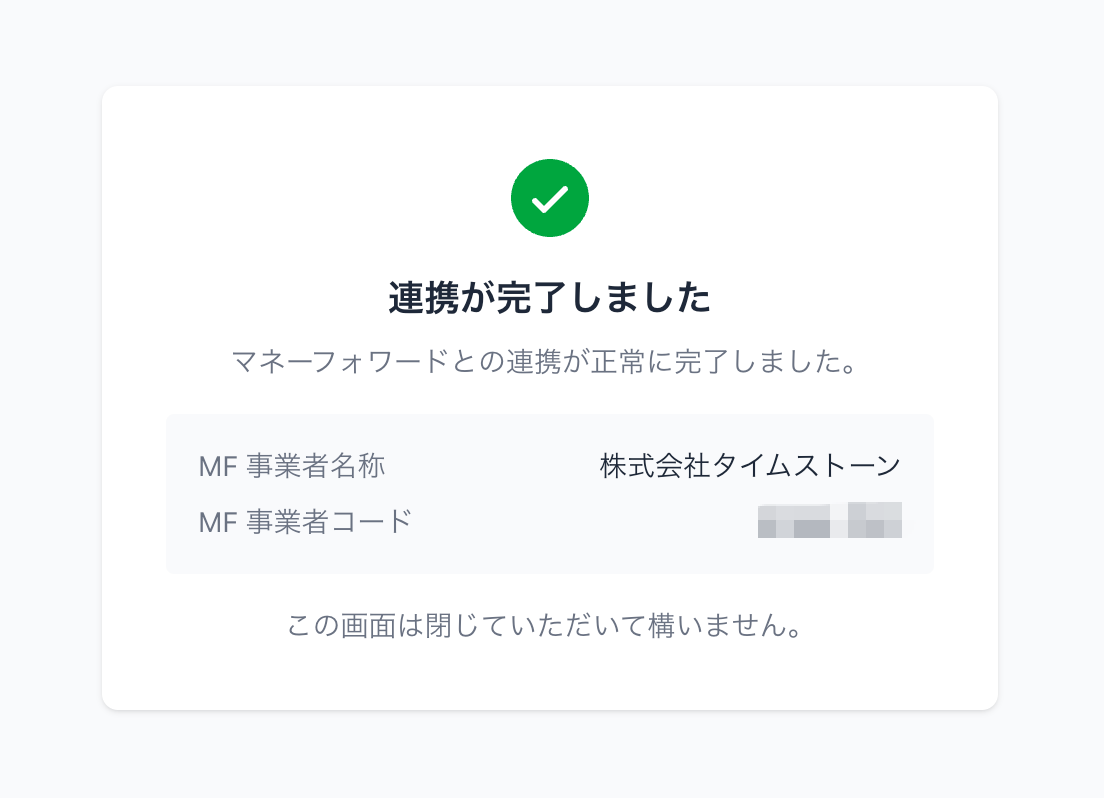
5. When the 「連携が完了しました」 (Integration completed) page appears, you are done. You can close this page. Please let the person who sent you the link know that the integration is complete.
If an error appears
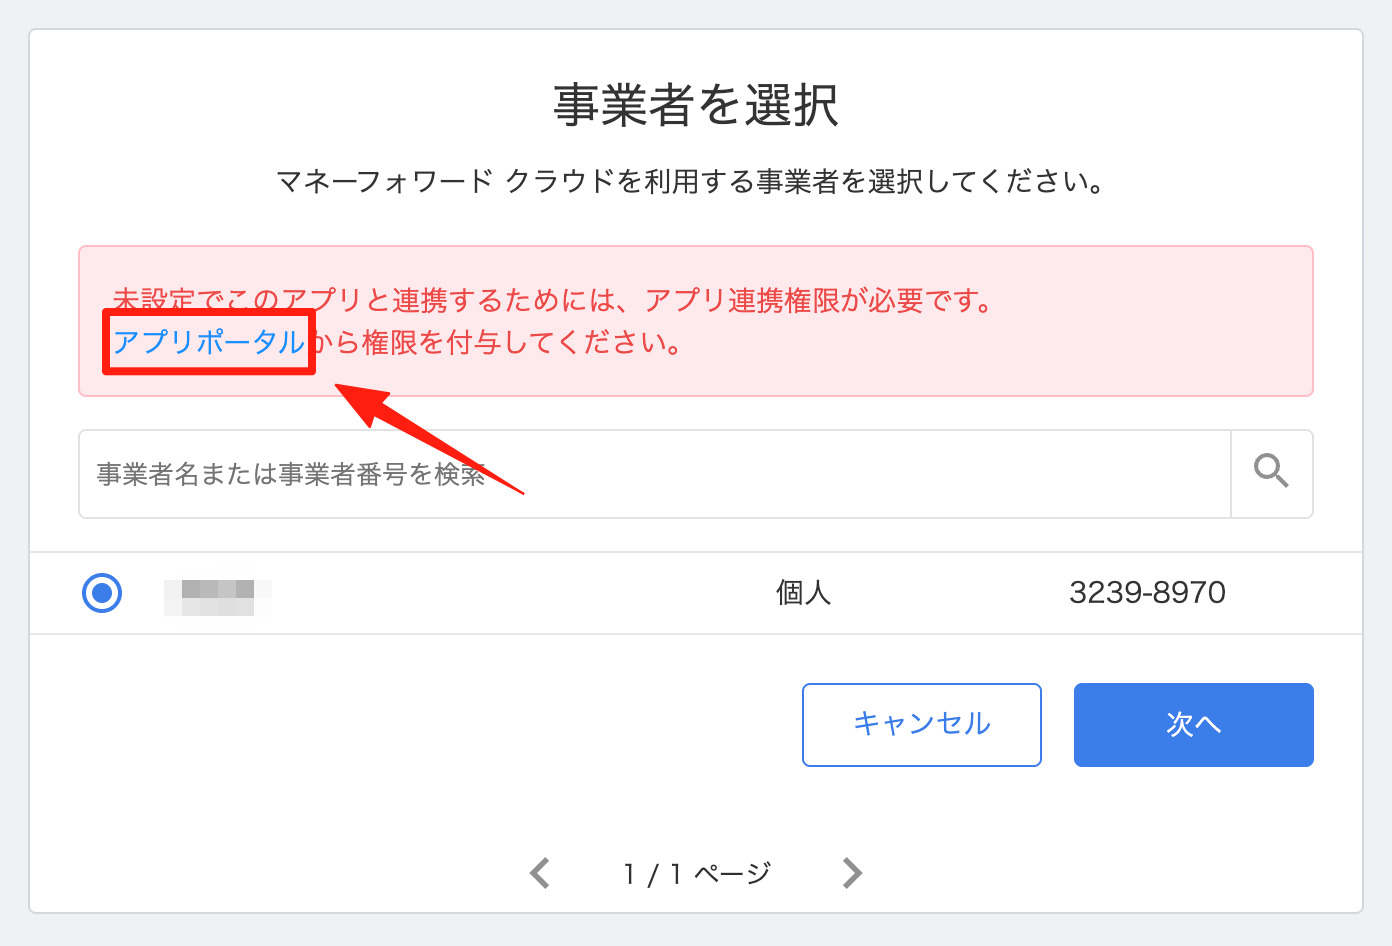
If 「アプリ連携権限が必要です」 (App integration permission is required) appears
1. Click 「アプリポータル」 (App Portal) in the red message.
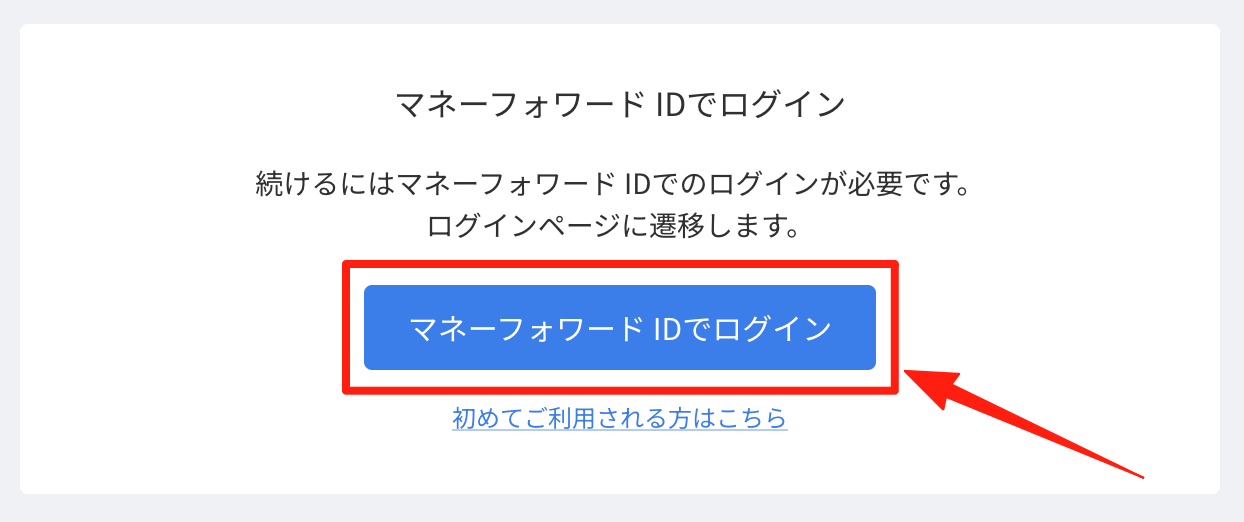
2. Click 「マネーフォワード IDでログイン」 (Log in with Money Forward ID).
3. On the 「アカウントを選択する」 (Select an account) page, click the account to log in with.
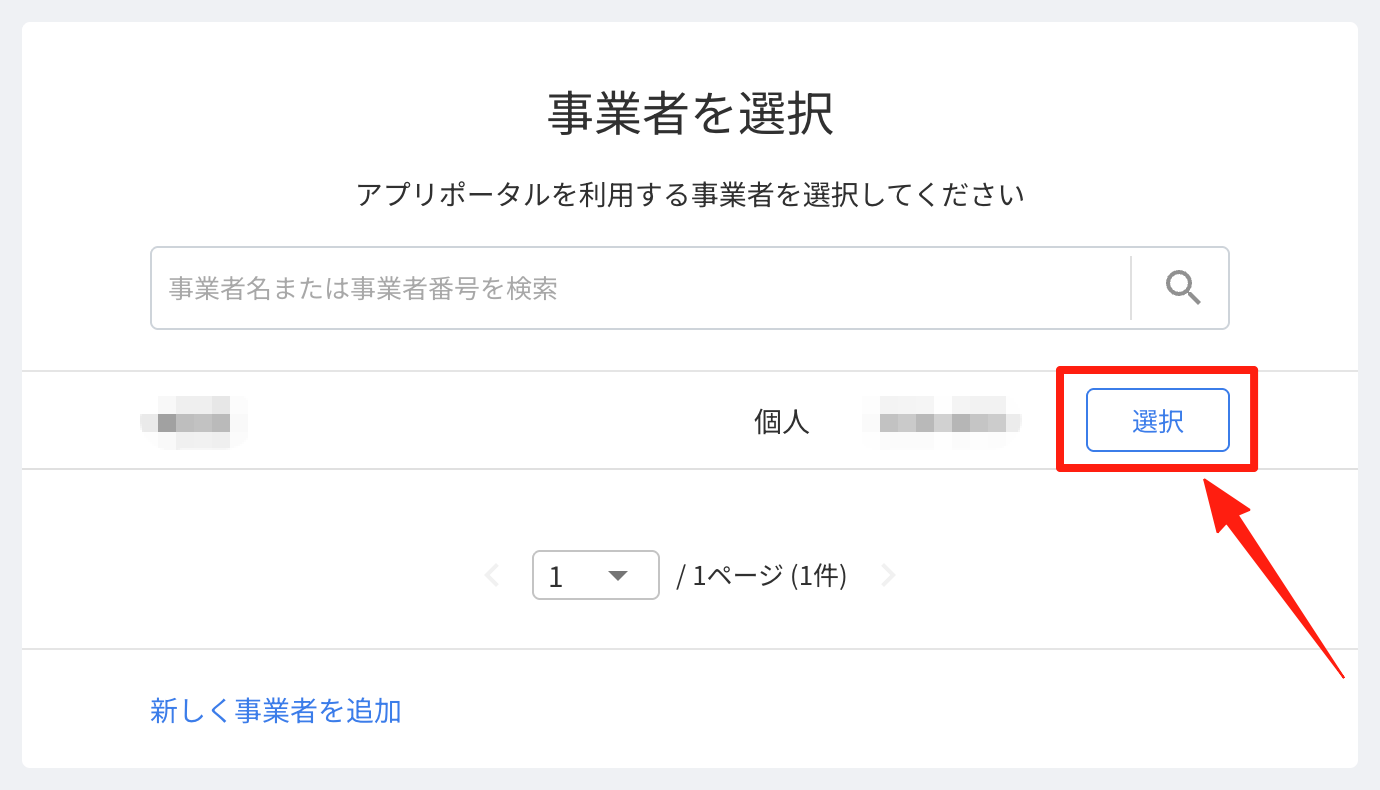
4. On the 「事業者を選択」 (Select a business) page, click 「選択」 (Select) for the business.
5. When the App Portal opens, click 「ユーザー」 (Users) in the left menu, then click the user to grant permission to.
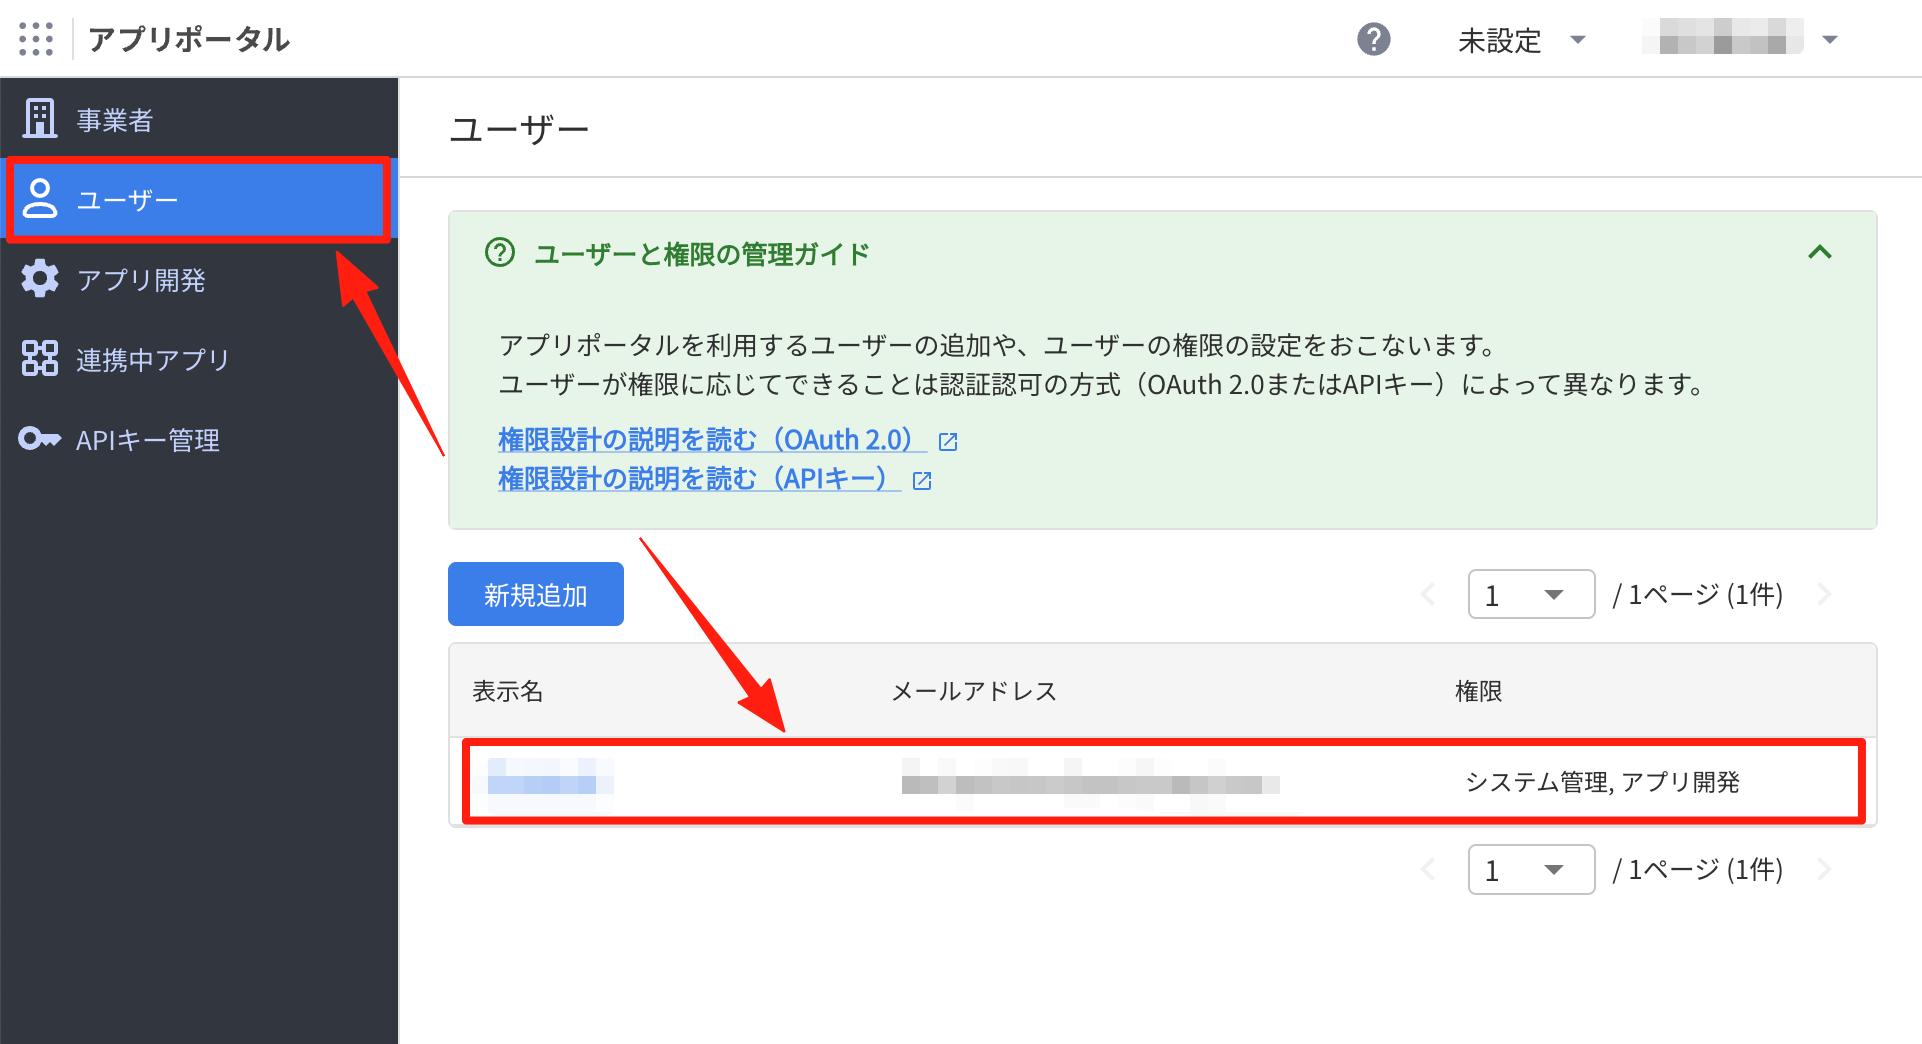
6. Click 「編集」 (Edit) in the upper right.
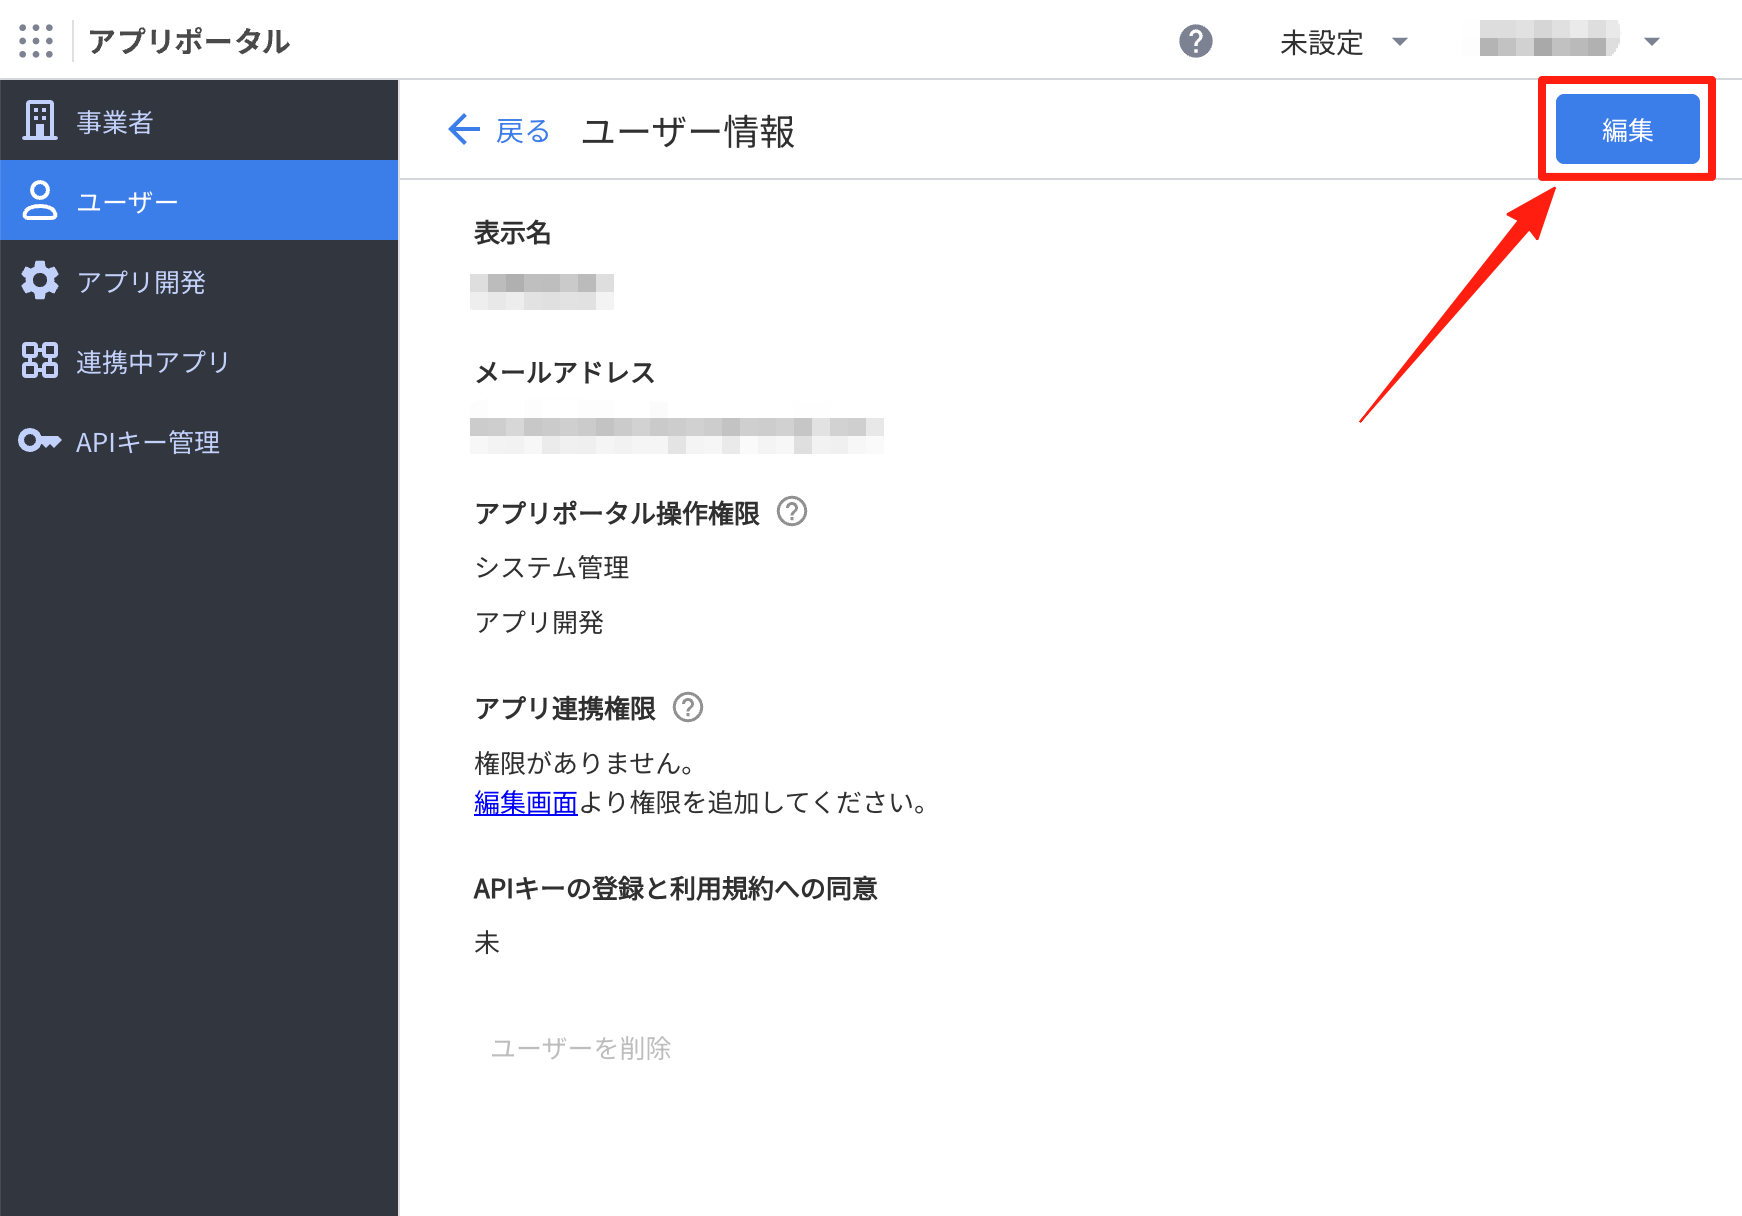
7. Check 「アプリ連携」 (App integration) under 「アプリ連携権限」 (App integration permission). Leave the other items as they are.
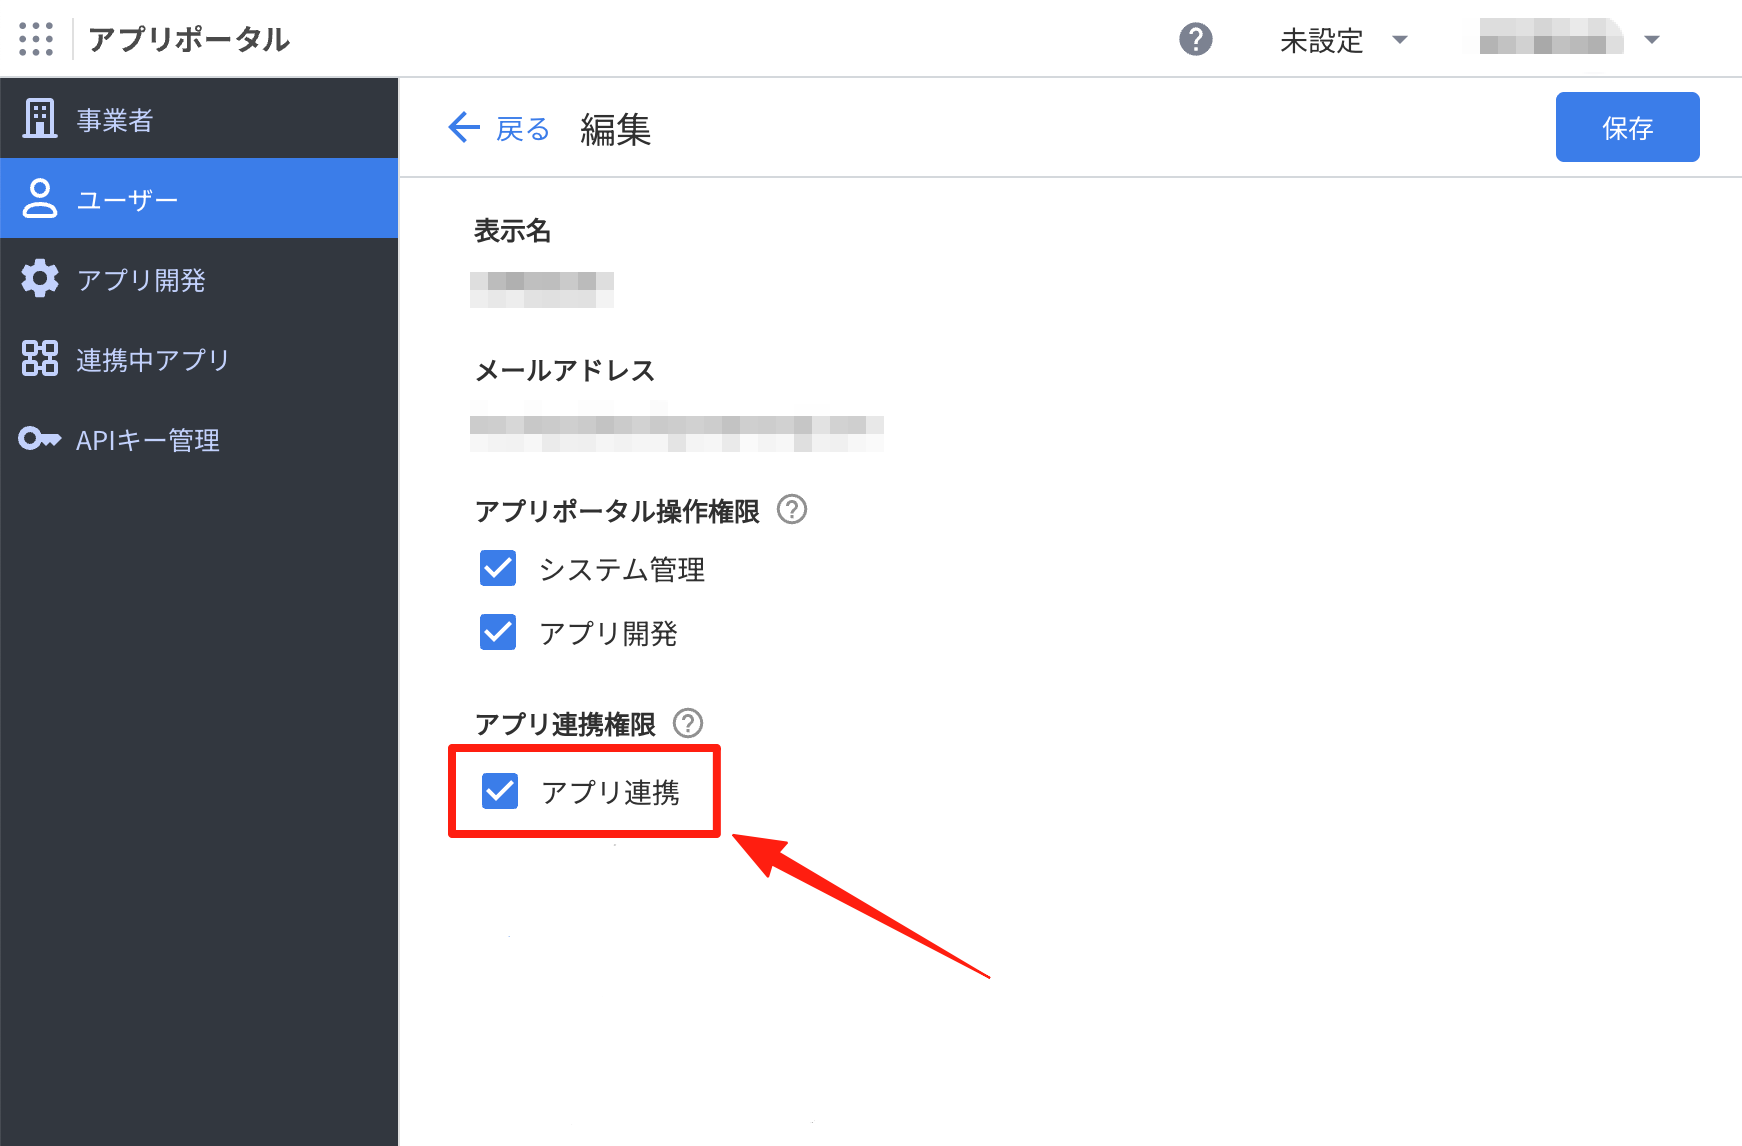
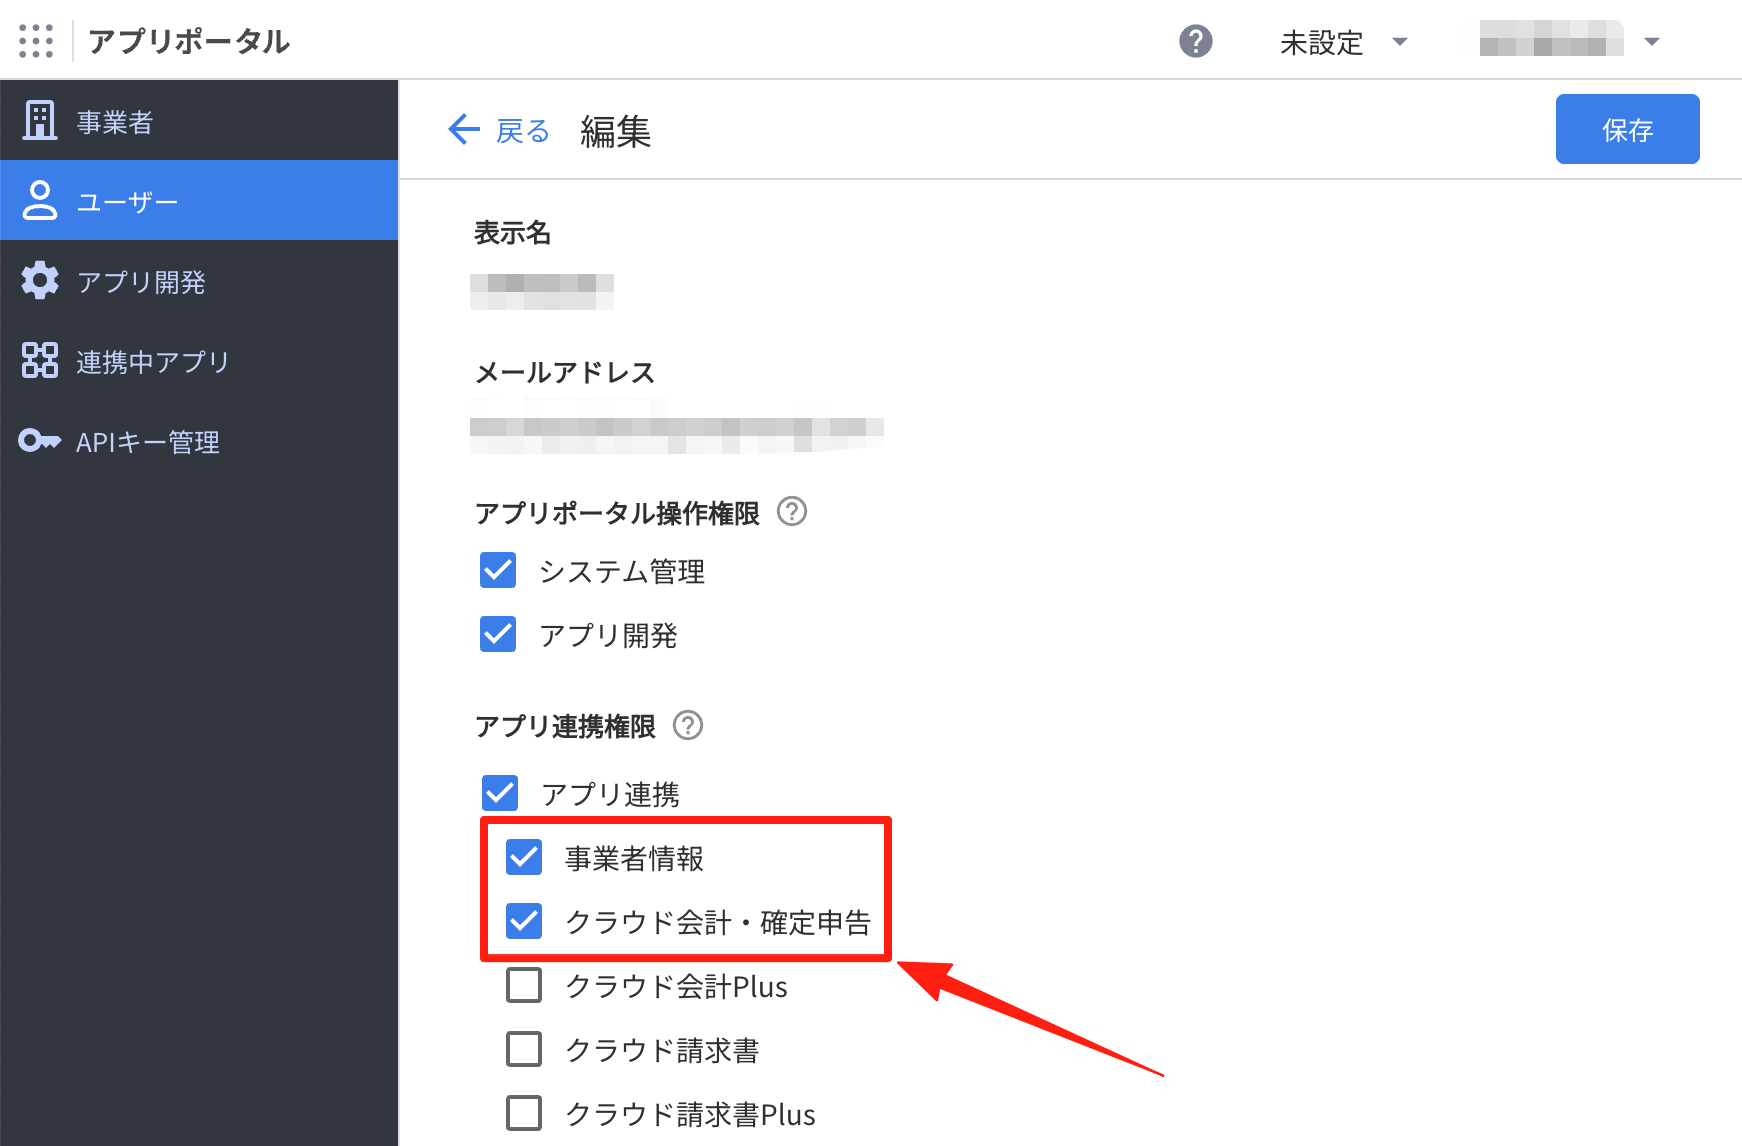
8. After you check 「アプリ連携」, more items appear below. Check 「事業者情報」 (Business information) and 「クラウド会計・確定申告」 (Cloud Accounting / Tax Return). Leave the other items as they are. Then click 「保存」 (Save) in the upper right.
9. Open the link you received again and follow the steps in “Allow integration” from the beginning. Saving the permission alone does not complete the integration.
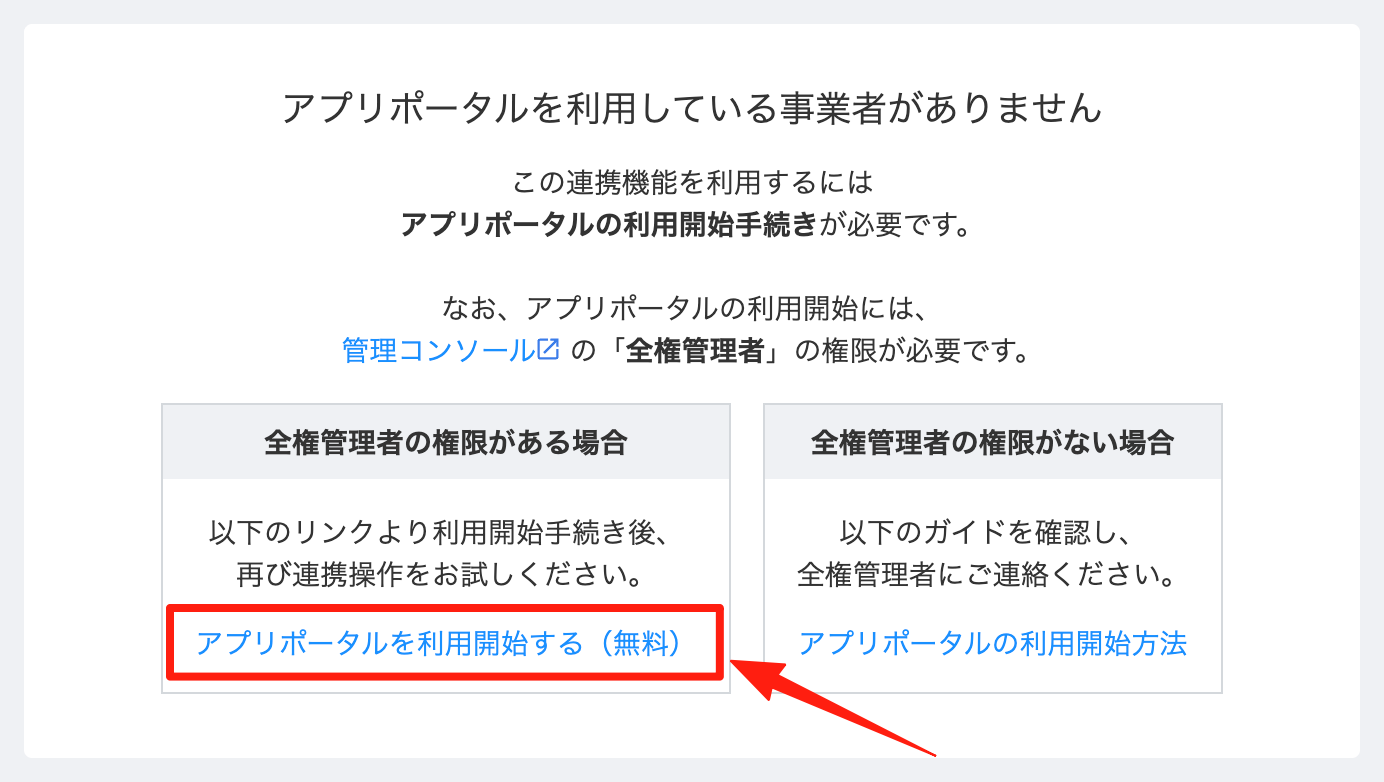
If 「アプリポータルを利用している事業者がありません」 (No business is using the App Portal) appears
1. Under 「全権管理者の権限がある場合」 (If you have full administrator permission), click 「アプリポータルを利用開始する(無料)」 (Start using the App Portal (free)).
2. Click 「マネーフォワード IDでログイン」 (Log in with Money Forward ID).
3. On the 「アカウントを選択する」 (Select an account) page, click the account to log in with.
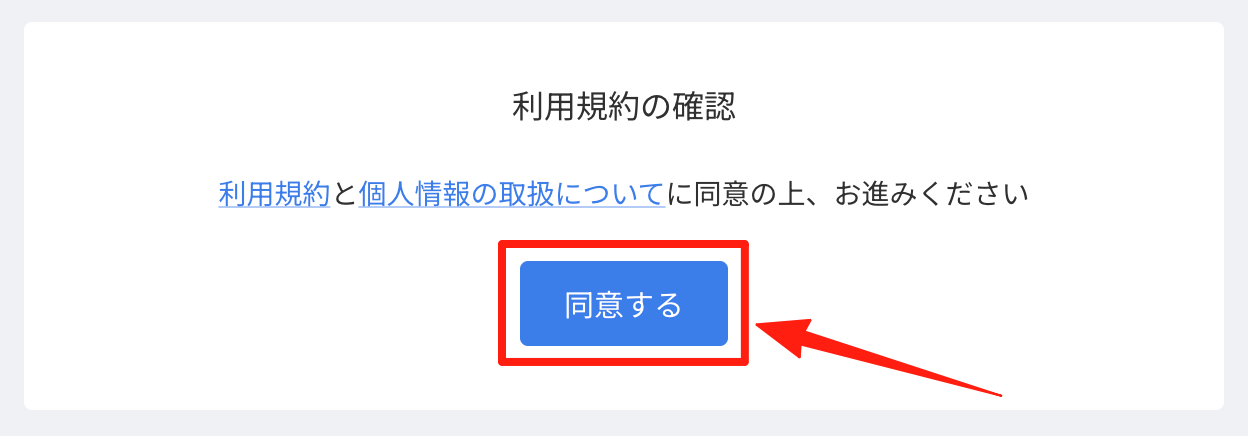
4. On the 「利用規約の確認」 (Confirm the terms of use) page, click 「同意する」 (Agree).
5. On the 「事業者を選択」 (Select a business) page, click 「選択」 (Select) for the business.
6. When the App Portal opens, click 「ユーザー」 (Users) in the left menu, then click the user to grant permission to.
7. Click 「編集」 (Edit) in the upper right.
8. Check 「アプリ連携」 (App integration) under 「アプリ連携権限」 (App integration permission). Leave the other items as they are.
9. After you check 「アプリ連携」, more items appear below. Check 「事業者情報」 (Business information) and 「クラウド会計・確定申告」 (Cloud Accounting / Tax Return). Leave the other items as they are. Then click 「保存」 (Save) in the upper right.
10. Open the link you received again and follow the steps in “Allow integration” from the beginning. Saving the permission alone does not complete the integration.